本篇使用 torchviz 软件包实现 PyTorch 计算图的可视化,做个记录,但个人感觉可视化的作用不是很大,大致的计算图结构其实通过代码都可以直接看出来,而且可能代码会更清楚些。
软件包安装(GitHub 网址为:https://github.com/szagoruyko/pytorchviz):
pip install torchviz另外,可能还需要下载安装:https://graphviz.org/download/,并添加到系统的环境变量中,不然运行时可能会报错。
代码例子:
"""
This code is supported by the website: https://www.guanjihuan.com
The newest version of this code is on the web page: https://www.guanjihuan.com/archives/40353
"""
import torch
import torchviz
# 简单网络的例子
class SimpleNet(torch.nn.Module):
def __init__(self):
super(SimpleNet, self).__init__()
self.fc1 = torch.nn.Linear(10, 6)
self.fc2 = torch.nn.Linear(6, 2)
def forward(self, x):
x = torch.relu(self.fc1(x))
x = self.fc2(x)
return x
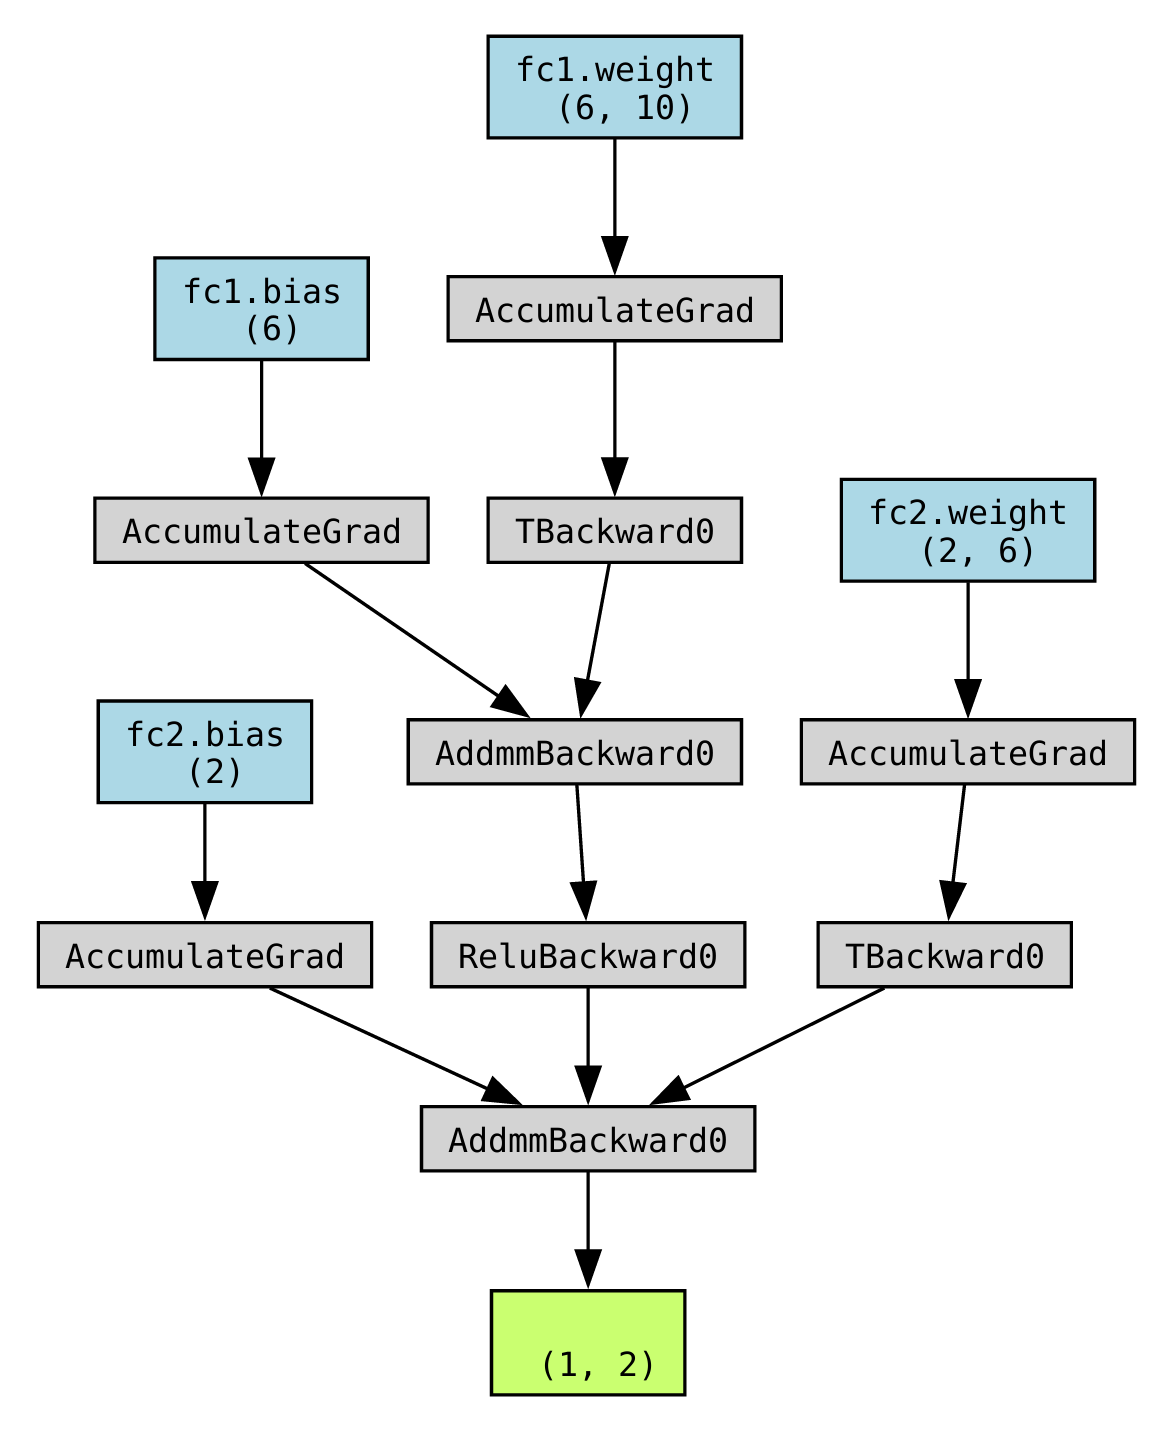
model = SimpleNet()
input = torch.randn(1, 10)
output = model(input)
graph = torchviz.make_dot(output, params=dict(model.named_parameters()))
graph.render("Simple_net_graph") # 保存计算图为 PDF 文件
# 卷积网络的例子
class ConvolutionalNeuralNetwork(torch.nn.Module):
def __init__(self):
super().__init__()
self.convolutional_layer_1 = torch.nn.Conv2d(in_channels=1, out_channels=10, kernel_size=3, stride=1, padding=1)
self.convolutional_layer_2 = torch.nn.Conv2d(in_channels=10, out_channels=10, kernel_size=3, stride=1, padding=1)
self.pooling_layer = torch.nn.MaxPool2d(kernel_size=2, stride=2)
self.hidden_layer_1 = torch.nn.Linear(in_features=10*7*7, out_features=10)
self.hidden_layer_2 = torch.nn.Linear(in_features=10, out_features=10)
self.output_layer = torch.nn.Linear(in_features=10, out_features=1)
def forward(self, x):
channel_output_1 = torch.nn.functional.relu(self.pooling_layer(self.convolutional_layer_1(x)))
channel_output_2 = torch.nn.functional.relu(self.pooling_layer(self.convolutional_layer_2(channel_output_1)))
channel_output_2 = torch.flatten(channel_output_2, 1)
hidden_output_1 = torch.nn.functional.relu(self.hidden_layer_1(channel_output_2))
hidden_output_2 = torch.nn.functional.relu(self.hidden_layer_2(hidden_output_1))
output = self.output_layer(hidden_output_2)
return output
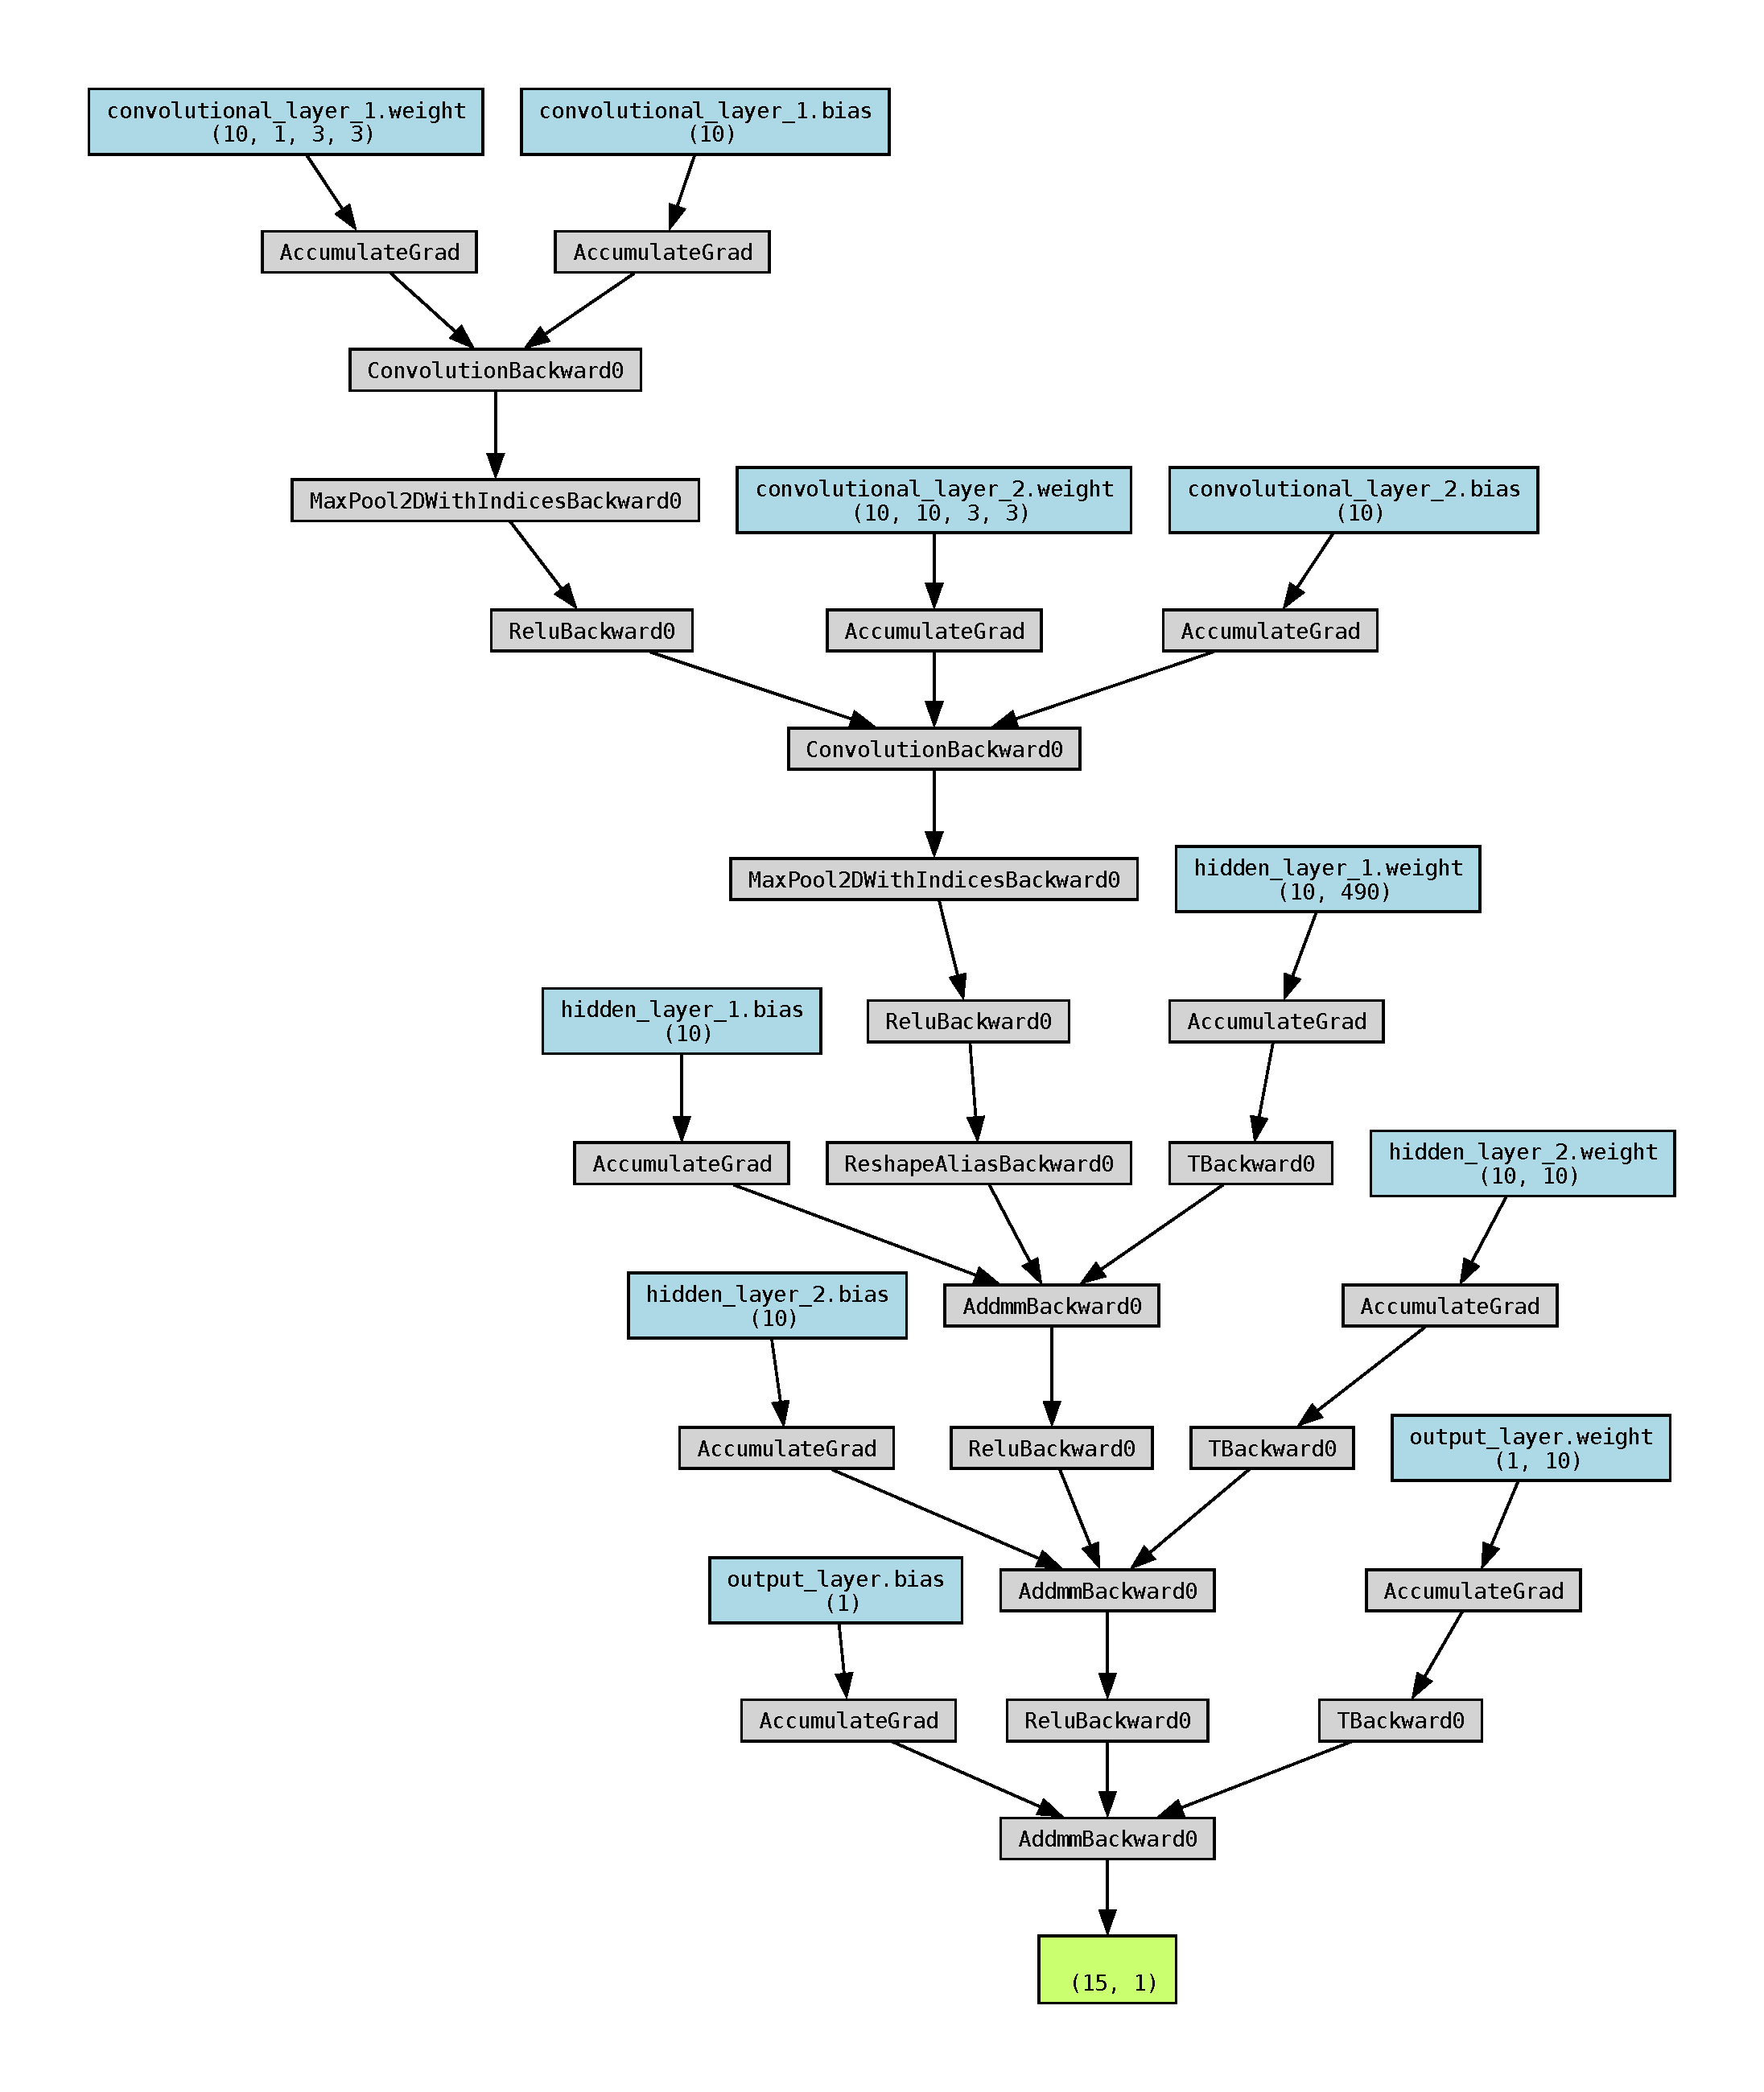
model = ConvolutionalNeuralNetwork()
input = torch.randn(15, 1, 28, 28)
output = model(input)
graph = torchviz.make_dot(output, params=dict(model.named_parameters()))
graph.render("CNN_graph") # 保存计算图为 PDF 文件运行结果:
大致的总结:
- 对于线性层,节点是 AddmmBackward0。其中,bias 之后是 AccumulateGrad,weight 之后是 AccumulateGrad 和 TBackward0。
- 对于卷积层,节点是 ConvolutionBackward0。其中,weight 和 bias 之后都是 AccumulateGrad。
- 一般来说看代码就可以直接想象出计算图的大概样子,这里生成的图只是用于辅助,方便直观地看出神经网络的复杂程度。
补充:节点的说明。以下由 AI 生成,使用的模型为 ChatGPT。
- AccumulateGrad: 这个节点表示梯度的累积。在反向传播过程中,梯度是被累积的,因为在每一次反向传播调用中,梯度都会被计算并加到之前的梯度上,以便进行梯度下降更新。
- TBackward0: 这个节点通常代表Tensor的反向传播操作。当在Tensor上进行某些操作并计算梯度时,这个节点将会出现,表示该Tensor的反向传播。
- AddmmBackward0: 这是矩阵乘法操作的反向传播。在神经网络中,矩阵乘法常用于线性层(fully connected layer)的计算,而这个节点则表示反向传播的计算。
- ConvolutionBackward0: 这是卷积操作的反向传播。在卷积神经网络中,卷积操作是一种常见的操作,这个节点表示卷积层的反向传播计算。
- MaxPool2DWithIndicesBackward0: 这个节点是最大池化操作的反向传播。在最大池化层中,通过取池化窗口中的最大值来减小输入的空间大小,这个节点表示最大池化操作的反向传播。
- ReluBackward0: 这是ReLU激活函数的反向传播。ReLU函数是一种常用的非线性激活函数,在深度学习中广泛使用。这个节点表示ReLU函数的反向传播计算。
- ReshapeAliasBackward0: 这个节点是reshape操作的反向传播。当对张量进行reshape操作时,这个节点表示reshape操作的反向传播计算。
【说明:本站主要是个人笔记和代码的分享,内容可能会不定期修改。目前文章支持直接转载,引用或转载请注明出处:https://www.guanjihuan.com 。本站采用知识共享署名许可协议 CC BY】